Windows XP VPN Server
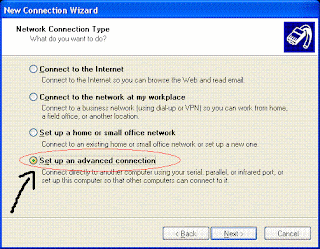
Step2: Select "Set up an advanced connection" and click "Next"
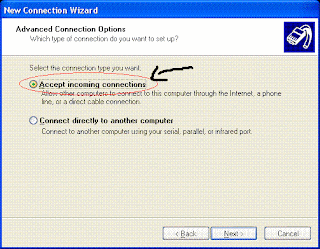
Step3: Select "Accept incomming connections" and click "Next"
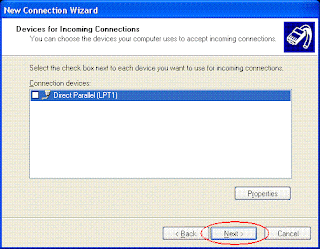
Step4: Just click "Next"
Step5: Select "Allow virtual private connections" and click "Next"
Step6: Create a nornal user (here eg: james) for allowing that user to dial VPN connections. just tick and click "Next"
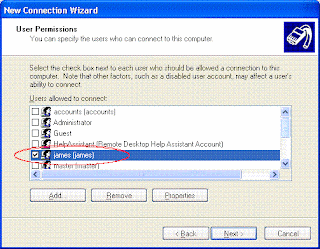 |
| Create a normal user for VPN access from other PCs |
Step8: Now specify the ip addresses to lease to VPN clients (give an ip range in server's network)
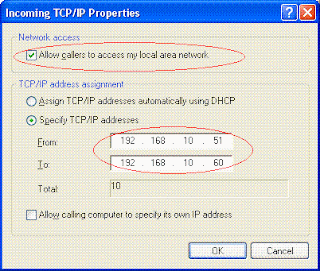 |
| Specify the ip addresses for VPN clients |
Step10: Now connect to VPN from another PC
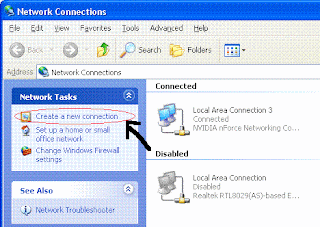
Go to Start =>Control Panel =>Network Connections and click "Create a new connection" =>
"Connect to the network at my workplace" => Virtual Private Network connection=>
Give any name as "Company name" => Give ip address of VPN Server => Finish
(A new network is now created under Network connections)
Now give username and password and click connect (see below screenshot)




0 comments:
Post a Comment