Stage 1
Requirements
1 : Download backtrack ISO from here
2 : Download VMware Workstation or VMplayer
3 : Install any of above
Stage 2
Installation
3 : choose Linux as your guest operating system type and Ubuntu as version


it will take up-to 30 minutes depend on your system
4 : give a name and location of your backtrack VM
5 : Specify virtual hard drive space ( 20 GB is good enough )
then click finish from ready to create vm window
hit enter to go boot screen then choose default boot text mode and hit enter
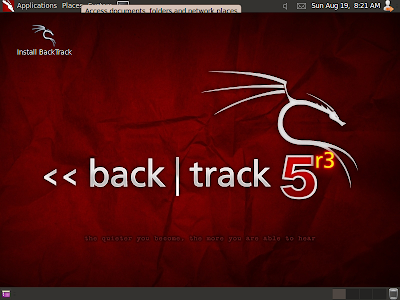
type startx to start GUI ( x server )
click on Install backtrack icon or open terminal type sh -c “ubiquity”

and continue like normal installation choose keyboard type and provide location info
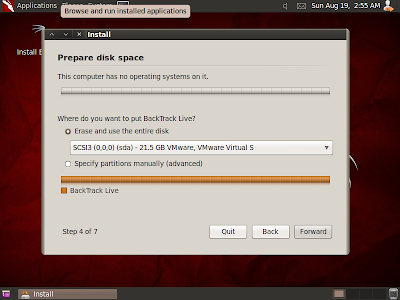
if you are installing just backtrack then go normally and erase and use entire disk
or if you installing backtrack with other OS then specify partition accordingly ( in this tutorial m using virtual hard-drive )

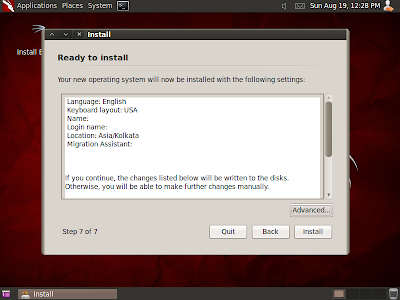
click on forward and click on install

wait until it finish installing
STAGE 3
This is second part of << backtrack virtual machine installation tutorial
in this tutorial i will cover how to install vmware tools and additionally how to install
Reboot and login with default username and password
1 : Eject and Disconnect Backtrack if its still mounted
2 : click on vm and choose install vmware tools
3 : if mount automatically then its okay else mount manually
fix-splash
apt-get upgrade
click on vm > snapshots
and create snapshot
and when you break or get messed up with your virtual machine just revert back to snapshot

This is second part of << backtrack virtual machine installation tutorial
in this tutorial i will cover how to install vmware tools and additionally how to install
Reboot and login with default username and password
username : root
password : toor
Before installing vmware tools
ONLY KDE users , fix unable to create symlink problem :
root@bt:~# mkdir /etc/cups/ppd
Prepare Kernels Source
root@bt:~#prepare-kernel-sourcesChange Root password of backtrack 5 R3 installation
root@bt:~#passwd root
Enter New UNIX Password :
Retype New UNIX Password :
passwd : Password Updated Successfully
After Prepare kernel sources now , Install vmware tools
1 : Eject and Disconnect Backtrack if its still mounted
2 : click on vm and choose install vmware tools
3 : if mount automatically then its okay else mount manually
root@bt:~#mkdir /mnt/vmtools
root@bt:~#mount /dev/cdrom /mnt/vmtools/
mount : block device /dev/sr0 is write-protected, mounting read-only
root@bt:~#cp /mnt/vmtools/VMwareTools-8.8.4-743747tar.gz /tmp
root@bt:~#cd /tmp
root@bt:/tmp#tar zxpf VMwareTools-8.8.4-743747tar.gz
root@bt:/tmp#cd vmware-tools-distrib/
root@bt:/vmware-tools-distrib/#perl ./vmware-install.pl
it will ask many question if you are not sure just go with defaults and when it finish installing simply type
fix-splash
root@bt:fix-splash
root@bt:reboot
this is third and last part of backtrack installation tutorial
after installing backtrack and vmwaretools
<
<< Second part
few things to do :
apt-get update
apt-get upgrade
click on vm > snapshots
and create snapshot
and when you break or get messed up with your virtual machine just revert back to snapshot


![Installing backtrack 5 R3 in virtual machine step by step [ how to ] Installing backtrack 5 R3 in virtual machine step by step [ how to ]](https://blogger.googleusercontent.com/img/b/R29vZ2xl/AVvXsEjxEDUbK8XSat5sbtqZZ4PdYQ7Y1hny87Ar-Lj-GWFJMcr4EEbLm9Eozkn1oUtxomDN63nNMyEV7_m7lAG1qVMaWCSIAtd4vVQj_21g1EUQBfJMnNoRM6Qvh4wZL99DiL0wwhJLueq29dnB/s1600/vm1.png)
![Installing backtrack 5 R3 in virtual machine step by step [ how to ] Installing backtrack 5 R3 in virtual machine step by step [ how to ]](https://blogger.googleusercontent.com/img/b/R29vZ2xl/AVvXsEgTPuWhk-WrAwIowmIfzuU5sgi49p72nMmOsRARHtxPsUeopK7f6ZYnBGOXMt0cOJ_Up-GIAeg1K6_5DQ_swSzo_rrby3Uum5assPVjU-N4Xr8gEbc3QB_EUv8b690unaW-MyLABDqOySC5/s640/vm2.png)


0 comments:
Post a Comment